ARC Raiders has 79 blueprints in its current state (75 actively obtainable as of Flashpoint 1.22.0), and they represent the single most important long-term system in the game. Each blueprint permanently unlocks a crafting recipe in your Workshop — meaning the difference between a player who has all blueprints and one who doesn’t isn’t just a handful of items, it’s the ability to gear up reliably before every raid instead of depending on RNG drops. This guide covers every blueprint by category, where to find it, how to farm efficiently across all five maps, which quests reward blueprints directly, and what materials you need to craft each item. Whether you want a fast reference tracker or a full farming plan, you’ll find both here.
What Are Blueprints in ARC Raiders?
Blueprints are permanent crafting recipes stored in your home base — Speranza. Once you pick up a blueprint during a raid and extract successfully, it automatically unlocks that item in your Workshop, where you can craft it any time you have the required materials and the right Workshop station level. You never need to find the same blueprint twice — it’s a one-time unlock.
There are five main blueprint categories in ARC Raiders:
- Weapon Blueprints — unlock guns ranging from shotguns and SMGs to energy weapons and legendary rifles. These are the rarest and most sought-after.
- Weapon Attachment Blueprints — unlock mods like suppressors, extended magazines, grips, and stocks. These are more common than weapons but still valuable.
- Grenade & Mine Blueprints — unlock throwables and deployables including Blaze Grenades, Seeker Grenades, and various mines.
- Medical Blueprints — unlock healing items like the Vita Shot and Defibrillator.
- Augment Blueprints — unlock Mk.3 augments that significantly upgrade your shield capacity, loot slots, and combat capabilities.
Blueprints connect directly to your Expedition progression — the further you advance, the more Workshop stations you can upgrade, which in turn determines which crafted items you can actually produce. Unlocking the blueprint is only step one; having Gunsmith Lv3 or Gear Bench Lv2 is what lets you actually craft the high-tier items. [LINK: Expedition progression guide]
All ARC Raiders Blueprints — Complete List
Below is the complete arc blueprint tracker organized by category. Difficulty ratings reflect a combination of spawn rarity, zone accessibility, and event exclusivity.
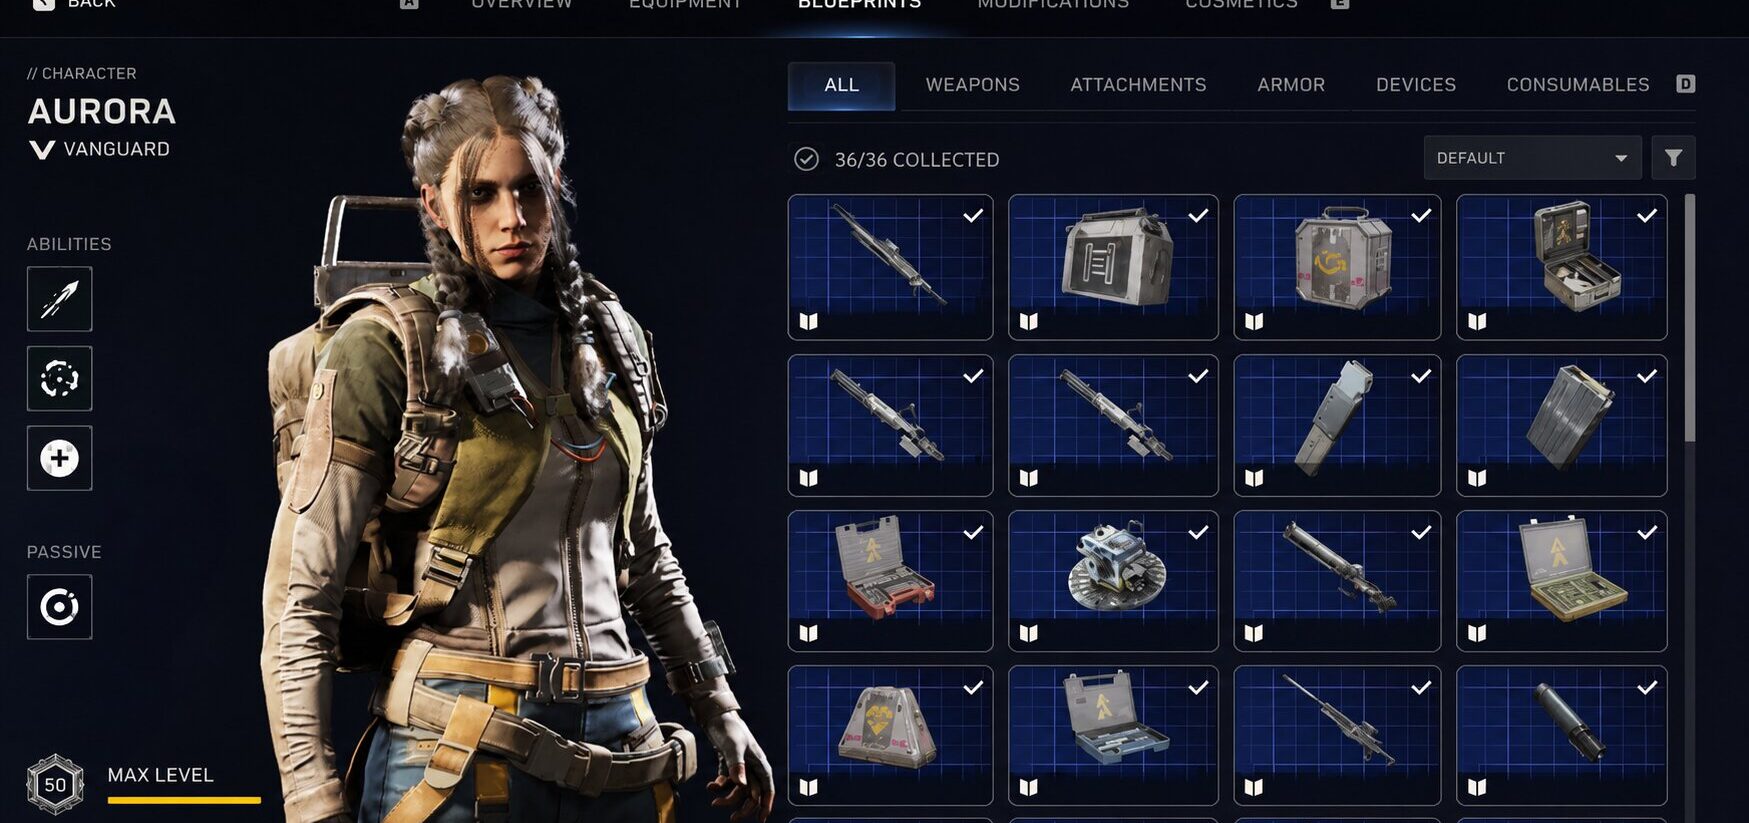
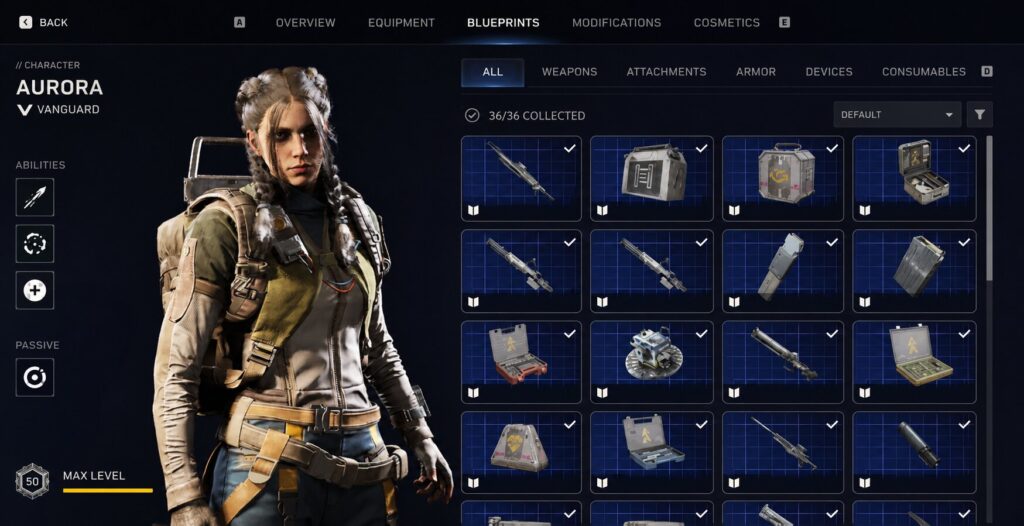
[SCREENSHOT: Blueprint tab in character menu showing full blueprint list]
Weapon Blueprints (19 total)
|
Blueprint Name |
Category |
Zone / Location |
How to Get |
Difficulty |
|
Anvil |
Weapon |
All maps |
World drop (weapon cases, raider containers) |
★★★ Hard |
|
Aphelion Rifle |
Weapon |
Stella Montis (Medical Research, Cultural Archives) |
Random drop |
★★★ Hard |
|
Bettina |
Weapon |
All maps |
World drop (breach rooms, security checkpoints) |
★★★ Hard |
|
Bobcat |
Weapon |
Blue Gate (Closed Gate event) |
Event-specific drop |
★★★ Hard |
|
Burletta |
Weapon |
Buried City, Spaceport |
Loot from weapon cases and containers |
★★ Medium |
|
Canto |
Weapon |
All maps — best: Dam (Control Tower, Hydroponic Dome), Buried City (Hospital, Town Hall) |
Hurricane First Wave Raider Caches; Night Raid locked rooms |
★★★ Hard |
|
Deadline |
Weapon |
All maps |
World drop (high-value containers) |
★★★ Hard |
|
Dolabra |
Weapon |
Close Scrutiny ARC Operation (Assessor containers) |
Exclusive to Close Scrutiny event |
★★★ Hard |
|
Equalizer |
Weapon |
Harvester Event (any map) |
Harvester event completion reward |
★★★ Hard |
|
Hullcracker |
Weapon |
All maps |
World drop — includes ammo blueprint |
★★★ Hard |
|
Il Toro |
Weapon |
All maps |
World drop (breach rooms) |
★★★ Hard |
|
Jupiter |
Weapon |
Harvester Event (any map) |
Harvester event completion reward |
★★★ Hard |
|
Osprey |
Weapon |
All maps |
World drop (weapon cases) |
★★ Medium |
|
Showstopper |
Weapon |
All maps |
World drop (high-value containers) |
★★ Medium |
|
Tempest I |
Weapon |
Any Night version of any map |
Night Raid random drop |
★★ Medium |
|
Torrente |
Weapon |
All maps |
World drop |
★★ Medium |
|
Venator |
Weapon |
All maps |
World drop |
★★ Medium |
|
Vulcano |
Weapon |
Dam — Hidden Bunker event |
Hidden Bunker event only |
★★★ Hard |
|
Wolfpack |
Weapon |
All maps — quieter residential zones |
Weapon cases (not high-value dense zones) |
★★ Medium |
Weapon Attachment Blueprints (24 total)
|
Blueprint Name |
Category |
Zone / Location |
How to Get |
Difficulty |
|
Angled Grip II / III |
Attachment |
All maps |
World drop (containers) |
★ Easy |
|
Compensator II / III |
Attachment |
All maps |
World drop |
★ Easy |
|
Extended Barrel |
Attachment |
All maps |
World drop |
★★ Medium |
|
Extended Light Mag II / III |
Attachment |
All maps |
World drop |
★ Easy |
|
Extended Medium Mag II / III |
Attachment |
All maps |
World drop |
★ Easy |
|
Extended Shotgun Mag II / III |
Attachment |
All maps |
World drop |
★ Easy |
|
Lightweight Stock |
Attachment |
All maps |
World drop |
★ Easy |
|
Muzzle Brake II / III |
Attachment |
All maps |
World drop |
★ Easy |
|
Padded Stock |
Attachment |
All maps |
World drop |
★ Easy |
|
Shotgun Choke II / III |
Attachment |
All maps |
World drop |
★ Easy |
|
Shotgun Silencer |
Attachment |
All maps |
World drop |
★★ Medium |
|
Silencer I / II |
Attachment |
All maps |
World drop |
★★ Medium |
|
Stable Stock II / III |
Attachment |
All maps |
World drop |
★ Easy |
|
Vertical Grip II / III |
Attachment |
All maps |
World drop |
★ Easy |
Grenade, Mine & Utility Blueprints (14 total)
|
Blueprint Name |
Category |
Zone / Location |
How to Get |
Difficulty |
|
Barricade Kit |
Tactical / Utility |
All maps |
World drop |
★ Easy |
|
Blaze Grenade |
Grenade |
All maps |
World drop |
★ Easy |
|
Defibrillator |
Medical |
All maps |
World drop |
★★ Medium |
|
Explosive Mine |
Mine |
All maps |
World drop |
★ Easy |
|
Fireworks Box |
Utility |
All maps |
World drop |
★ Easy |
|
Gas Mine |
Mine |
All maps |
World drop |
★ Easy |
|
Jolt Mine |
Mine |
All maps |
World drop |
★★ Medium |
|
Lure Grenade |
Grenade |
All maps |
World drop |
★ Easy |
|
Pulse Mine |
Mine |
All maps |
World drop |
★ Easy |
|
Remote Raider Flare |
Utility |
All maps |
World drop |
★★ Medium |
|
Seeker Grenade |
Grenade |
All maps |
World drop |
★★ Medium |
|
Smoke Grenade |
Grenade |
All maps |
World drop |
★ Easy |
|
Surge Coil |
Deployable |
Close Scrutiny; Electro Storm (Dam, Control Tower) |
Close Scrutiny event / Electro Storm |
★★★ Hard |
|
Vita Shot |
Medical |
All maps |
World drop |
★★ Medium |
Augment Blueprints (6 total, Mk.3 only)
|
Blueprint Name |
Category |
Zone / Location |
How to Get |
Difficulty |
|
Combat Mk. 3 (Aggressive) |
Augment |
Blue Gate |
Random drop |
★★★ Hard |
|
Combat Mk. 3 (Flanking) |
Augment |
Blue Gate |
Random drop |
★★★ Hard |
|
Looting Mk. 3 (Safekeeper) |
Augment |
All maps |
Random drop |
★★★ Hard |
|
Looting Mk. 3 (Survivor) |
Augment |
All maps |
Random drop |
★★★ Hard |
|
Tactical Mk. 3 (Defensive) |
Augment |
All maps |
Random drop |
★★★ Hard |
|
Tactical Mk. 3 (Healing) |
Augment |
All maps |
Random drop |
★★★ Hard |
Note: Mk.1 and Mk.2 augment blueprints are available as common world drops on any map. Mk.3 variants are the rare versions listed above.
Best Locations to Find Blueprints
Every map in ARC Raiders can drop blueprints, but the drop rates are not equal across container types or zones. Weapon cases, raider containers (the black boxes with a ticking sound), and breach room containers offer significantly higher blueprint drop rates than standard loot. Security Lockers — which require level 36 in the Survive skill tree — are the single highest-rate blueprint containers in the game.
[SCREENSHOT: Dam Battlegrounds map with blueprint container locations marked]
Dam Battlegrounds Blueprints
Dam is one of the most reliable blueprint maps due to its high density of weapon cases and breach rooms. Two specific spots stand out: the Control Tower, which contains multiple high-value containers on the upper floors, and the Hydroponic Dome, which often has weapon cases with above-average blueprint rates. The Dam Ledge — accessible by following the narrow floodgate walkway and breaching barricaded doors — is a lower-traffic area that experienced players use for consistent container runs. The Hidden Bunker event on Dam is the exclusive source of the Vulcano blueprint; watch for it on your raid forecast.
- Best containers: breach rooms, Control Tower storage, Hydroponic Dome weapon cases
- Event-exclusive: Vulcano blueprint drops only during Hidden Bunker
- Canto blueprint farms: Control Tower and Hydroponic Dome are confirmed hotspots during Hurricane modifier
Buried City Blueprints
Buried City rewards methodical routing more than fast farming. The Hospital and Town Hall buildings contain the highest concentration of weapon cases in the map, making them the primary targets for blueprint hunters. Raider Caches in Buried City drop at standard rates; prioritize the closed rooms over open areas. The Burletta blueprint drops here at a higher frequency than on other maps according to community tracking data.
- Best containers: Hospital and Town Hall weapon cases, closed rooms
- Notable drops: Burletta blueprint has a confirmed higher rate in Buried City
- Strategy: clear and loot Hospital first, Town Hall second — both buildings in one run
Spaceport Blueprints
Spaceport’s Arrival and Departure terminals contain dense weapon case clusters, especially in the secure storage areas behind locked doors. This map is particularly strong during Night Raid modifier — the Tempest I blueprint has a known higher drop rate during any Night version of any map, and Spaceport’s indoor layout makes it easier to farm safely in low visibility. Breach rooms in the terminal security wing are worth prioritizing every run.
- Best containers: Arrival and Departure terminal weapon cases, security wing breach rooms
- Night Raid priority: Tempest I blueprint drops at higher rates on any Night map
- Rotation tip: the compact layout allows a full terminal loop in under 15 minutes
[SCREENSHOT: Buried City overview with key farming spots marked]
Blue Gate Village Blueprints
Blue Gate is the map of choice for players farming Combat Mk.3 augment blueprints, as both Combat Mk.3 (Aggressive) and Combat Mk.3 (Flanking) appear to drop exclusively or at heavily elevated rates here. The Gate Approach and Pilgrim’s Peak sub-areas are the best container density spots. The Closed Gate event on Blue Gate is the exclusive source of the Bobcat weapon blueprint — check your raid forecast before loading in.
- Best containers: Gate Approach, Pilgrim’s Peak locked rooms
- Event-exclusive: Bobcat blueprint drops only during Closed Gate event
- Augment focus: highest known drop rate for Combat Mk.3 augment blueprints
Stella Montis Blueprints
Stella Montis is the Aphelion Rifle blueprint’s home map — this weapon blueprint can only be farmed as a random drop here. The Medical Research and Cultural Archives sub-areas hold the best container clusters. This map has a lower overall blueprint density compared to Dam and Buried City, but for players specifically chasing the Aphelion, it’s the only option. Pair a Stella Montis run with the Close Scrutiny ARC Operation for maximum efficiency during that event.
- Exclusive drop: Aphelion Rifle blueprint — Stella Montis only
- Best containers: Medical Research facility rooms, Cultural Archives storage
- Pair with: Close Scrutiny operation for Dolabra blueprint rolls
How to Farm Blueprints Fast
Blueprint farming in ARC Raiders is not RNG-based luck — it is a container selection and route optimization problem. Players who get blueprints faster are targeting the right containers in the right conditions, not just opening more boxes.
- Prioritize container type over zone: Weapon cases, raider containers (ticking black boxes), and breach room containers have the highest blueprint drop rates. Standard crates and open world containers rarely drop blueprints. Every farming run should route through at least three high-value container types before extracting.
- Use Night Raid and Hurricane modifiers: Night Raid is the single best blueprint farming condition — drop rates from all containers are measurably higher compared to standard raids. Hurricane modifier’s First Wave Raider Caches are the current best-known source for the Canto blueprint and generally improve blueprint frequency across the board. Check your raid forecast at Speranza before queuing. [LINK: dedicated blueprint farming guide]
- Unlock Security Lockers: Once you reach level 36 in the Survive skill tree, Security Lockers become accessible. These purple-tier containers consistently deliver rare blueprints while most players ignore them entirely. Routing through Security Locker locations should become a core part of any advanced farming rotation.
- Recommended starting route — Dam priority: For players under Workshop Lv3, start with Dam Control Tower breach rooms and Hydroponic Dome weapon cases. This route offers the best blueprint-per-raid value at lower gear levels. For players farming specific weapon blueprints, check the event schedule and load into the corresponding event map.
- Container respawn logic: Blueprint containers follow standard ARC Raiders respawn rules — they reset between raids, not within a single raid. There is no in-raid respawn. Each new session is a fresh roll, so short runs with clean routing beat long runs looting every container.
If you’re spending dozens of hours chasing rare blueprints like Equalizer, Dolabra, or the Combat Mk.3 augments and not making progress, ARC Raiders progression boost services can help you unlock specific blueprints without the grind. Check boost options at [LINK: ARC Raiders boost services].
[SCREENSHOT: Recommended farming route through Dam Control Tower and Hydroponic Dome]
Quest Blueprints — Blueprints from Missions
A small but important portion of ARC Raiders blueprints come from quests rather than container drops. These are predictable — you’re not gambling on RNG. If you’re trying to build out your Workshop early, quest blueprints are worth completing before starting container farming runs.
The most notable quest blueprint is Tempest I, which can be obtained through the quest line tied to Tian Wen. Progressing Tian Wen’s missions until “The Major’s Footlocker” objective unlocks, then heading to the Ruby Apartments near the northwest entrance, looting the quest item on the second floor, and extracting with it in a safe pocket awards the Tempest I blueprint as a quest reward. [LINK: Tempest Blueprint quest walkthrough]
Several other progression-gating quests award utility and augment blueprints as completion rewards. The general approach is to complete your main quest chain in order before branching into contract grinding — the quest rewards provide enough early-game blueprint coverage to meaningfully reduce your dependency on RNG drops for core Workshop recipes. [LINK: complete quest blueprint guide]
Key points about quest blueprints:
- Quest blueprints are guaranteed — no drop rate, just completion
- Tempest I is obtainable through Tian Wen’s quest chain (Ruby Apartments objective)
- Harvester Event awards Equalizer and Jupiter — watch your map for the Queen’s Harvester puzzle
- Vulcano drops exclusively during the Hidden Bunker event on Dam, not from quests
Blueprint Crafting — What You Can Make
Once a blueprint is unlocked, crafting happens at the appropriate Workshop station in Speranza. Each station has three upgrade levels (Lv1, Lv2, Lv3), and higher-tier blueprints require higher station levels. You can check crafting requirements in the Workshop interface without unlocking the blueprint first.
Below is a crafting reference table for the most-farmed blueprints:
|
Blueprint |
Item Type |
Station Required |
Crafting Materials |
|
Wolfpack |
Assault Rifle |
Gunsmith Lv2 |
Metal Parts x4, Wires x3, Magnets x2 |
|
Burletta |
Shotgun |
Gunsmith Lv2 |
Metal Parts x5, Industrial Battery x2, Wires x2 |
|
Osprey |
Sniper Rifle |
Gunsmith Lv2 |
Advanced Mechanical Components x2, Metal Parts x4 |
|
Tempest I |
SMG |
Gunsmith Lv2 |
Metal Parts x3, Wires x2, Cooling Fans x1 |
|
Canto |
SMG |
Gunsmith Lv3 |
Advanced Mechanical Components x2, Magnets x5, Medium Gun Parts x3 |
|
Dolabra |
Energy Shotgun |
Gunsmith Lv3 |
Shredder Gyro x3, Magnetic Accelerator x3, Vaporizer Regulator x2 |
|
Anvil |
Assault Rifle |
Gunsmith Lv3 |
Advanced Mechanical Components x3, Metal Parts x5, Wires x3 |
|
Equalizer |
Special |
Gunsmith Lv3 |
ARC Alloy x2, Exodus Module x2, Magnetic Accelerator x2 |
|
Vita Shot |
Medical |
Medical Bench Lv1 |
Mushrooms x3, Rusted Gear x1, Wires x1 |
|
Defibrillator |
Medical |
Medical Bench Lv2 |
Mushrooms x5, Industrial Battery x2, Wires x2 |
|
Blaze Grenade |
Grenade |
Gear Bench Lv1 |
Metal Parts x2, Cooling Fans x1 |
|
Seeker Grenade |
Grenade |
Gear Bench Lv2 |
Metal Parts x3, Wires x2, Magnets x1 |
For material-specific farming:
- Mushrooms — found in Dam and Buried City vegetation zones [LINK: where to find Mushrooms]
- Cooling Fans — dropped from ARC machine loot and electronic equipment containers [LINK: Cooling Fans locations]
- Industrial Battery — found in industrial/mechanical zones on Dam and Spaceport
- Advanced Mechanical Components — rare drop from raider caches and ARC enemies
- ARC Alloy / Exodus Modules — dropped from high-tier ARC machines and Exodus caches (endgame materials)
Crafting tip: always check your current material stock before queuing a raid. Knowing you need 3 more Shredder Gyros for the Dolabra blueprint before loading in lets you run a targeted material farm rather than a general loot run.
Frequently Asked Questions
How many blueprints are in ARC Raiders? ARC Raiders currently has 79 blueprints total, with 75 actively obtainable as of the Flashpoint 1.22.0 update. The remaining 4 are either unreleased or temporarily disabled. The game’s tracker inside the Workshop shows your progress against the full list.
Where is the best place to farm blueprints in ARC Raiders? Dam Battlegrounds with the Night Raid or Hurricane modifier active. The Control Tower and Hydroponic Dome weapon cases, combined with breach room containers, give the highest blueprint-per-run odds. Security Lockers — unlocked at Survive skill level 36 — are the single highest-rate individual container type in the game.
Can you trade blueprints with other players? No. Blueprints in ARC Raiders are bound on pick-up and cannot be traded, dropped, or transferred between players. Every player must find their own blueprint drops.
Do blueprints respawn or are they one-time? Blueprint containers respawn every raid — each new session is a fresh set of container rolls. However, a blueprint you’ve already unlocked won’t drop again once collected; duplicates can potentially drop but serve no purpose since each blueprint is a one-time unlock.
What is the rarest blueprint in ARC Raiders? Event-exclusive blueprints are the rarest because they require a specific map event to be active when you load in. Dolabra (Close Scrutiny only), Vulcano (Hidden Bunker only), Bobcat (Closed Gate only), and both Equalizer and Jupiter (Harvester Event only) sit at the top of the rarity scale. Of world-drop weapons, the Anvil and Wolfpack are community-reported as among the rarest non-event drops.
What skills help with blueprint farming? The Survive skill tree is the most important — reaching level 36 unlocks Security Lockers, the highest-rate blueprint containers. Looting augments (Mk.2 and Mk.3) increase your loot efficiency per run. The Looting Mk.3 blueprints themselves are rare drops, so [LINK: best skill tree builds that use blueprints] can help you prioritize the progression path.
Can you get blueprints from the Trials mode? Yes. Trials is a confirmed source for some blueprint drops, though the rates and specific blueprints available through Trials vary. Weapon and attachment blueprints have been reported as Trials rewards, but the mode is generally considered a secondary farming method compared to Night Raid container routes.